3D Printer Cooling Fan Upgrade and Duct Guide: Boost Print Quality for Under $20
Why Stock Cooling Fans Fall Short
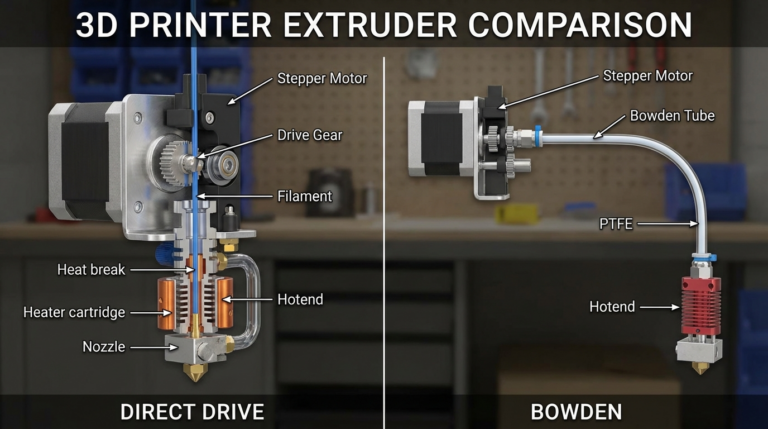
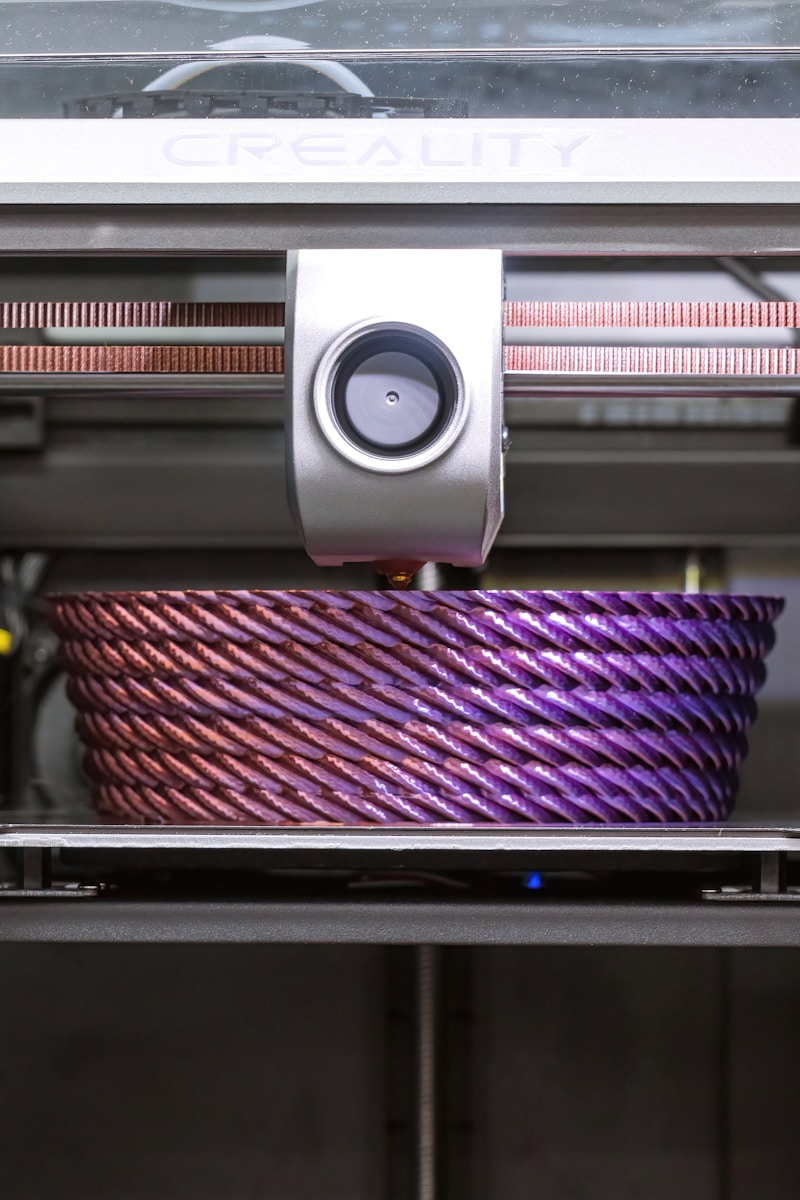
Most 3D printers ship with a single radial fan and a basic duct that directs air toward the print from one side. For slow, simple prints, this is adequate. But the moment you try printing overhangs steeper than 45 degrees, bridging gaps wider than 20mm, or running speeds above 100 mm/s, the limitations become obvious: drooping overhangs, rough bridges, and warped small features.
The problem isn’t always the fan itself — it’s the duct. Stock ducts typically deliver air from a single direction, creating uneven cooling that affects print quality differently depending on which way a feature faces. Upgrading your cooling system is one of the highest-impact modifications you can make to any FDM printer.
Understanding Part Cooling Fundamentals
What Cooling Actually Does
When molten filament is deposited, it needs to solidify quickly in the correct position. Without adequate cooling:
- Overhangs droop — gravity pulls the unsupported material downward before it solidifies
- Bridges sag — filament stretched across a gap droops in the middle
- Small features deform — the next layer is deposited before the previous one has fully cooled
- Stringing increases — warmer filament oozes more during travel moves
Airflow vs. Volume vs. Pressure
Three factors determine cooling effectiveness:
- Airflow volume (CFM): How much air the fan moves per minute
- Static pressure: The fan’s ability to push air through restrictive ductwork
- Directed airflow: How precisely the duct aims air at the nozzle tip and freshly deposited filament
A high-CFM fan with a poorly designed duct will perform worse than a moderate fan with excellent duct geometry. This is why upgrading the duct is often more impactful than upgrading the fan alone.
Types of Cooling Fan Upgrades
Single Fan, Better Duct
The simplest upgrade: keep your existing fan but replace the duct with an optimized design. Popular options include the Petsfang, HeroMe Gen7, and various printer-specific designs on Printables and Thingiverse.
Pros: Cheapest option (just print the duct), no wiring changes required
Cons: Still limited to single-direction airflow, fan output unchanged
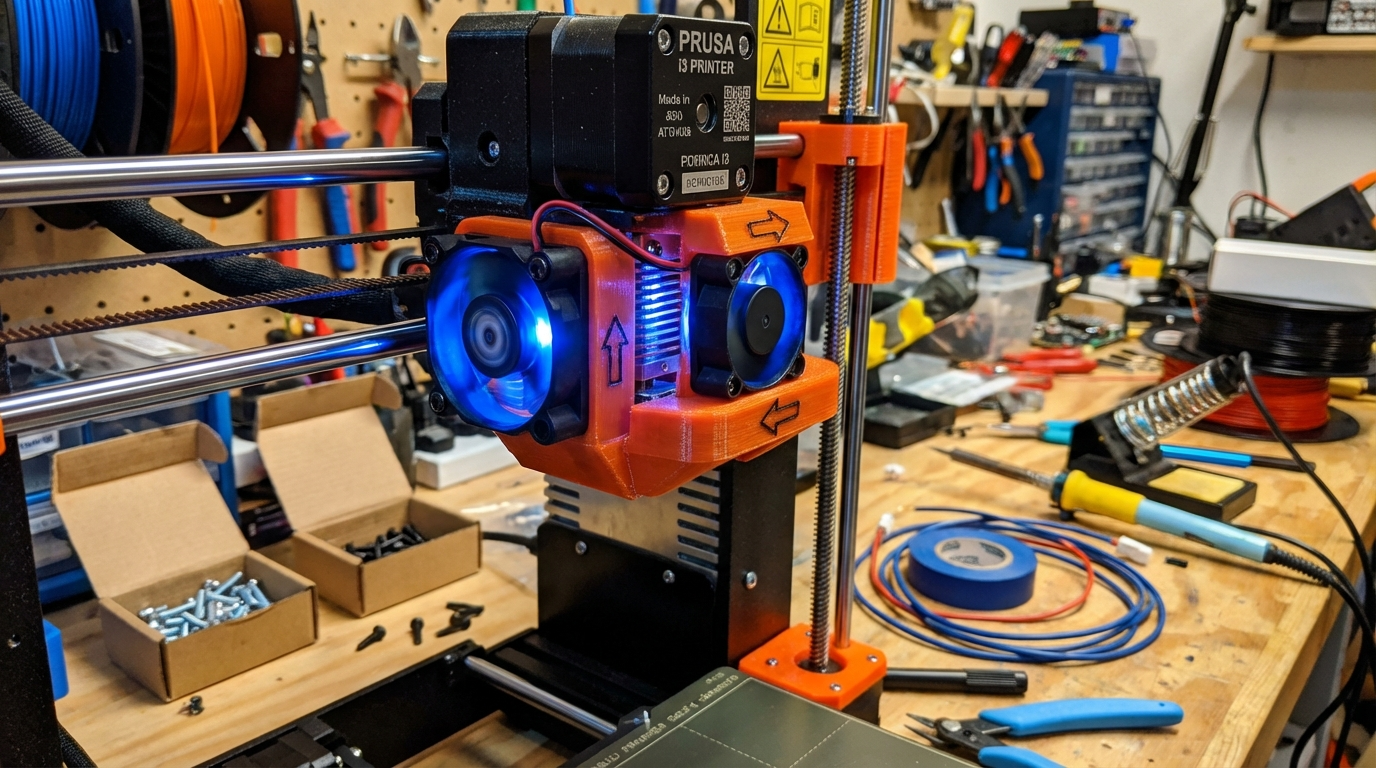
Dual 5015 Blower Fan Setup
The most popular upgrade path. Two 5015 radial blower fans mounted on opposite sides of the hotend deliver balanced cooling from both directions. This is the gold standard for most Ender 3 variants, CR-10 series, and similar bed-slinger printers.
Pros: Balanced airflow, massive cooling improvement, affordable ($5-8 per fan)
Cons: Adds weight to the printhead, requires wiring (parallel connection to single fan header)
4010/4020 Axial Fan Upgrade
Some duct systems are designed around 4010 or 4020 axial fans instead of radial blowers. These are common on newer printers with compact toolheads. The advantage is lower weight and noise, but they produce less static pressure, which limits duct design options.
CPAP Turbine Systems
The extreme end of part cooling. A remote-mounted CPAP blower (like the WS7040 turbine) delivers massive airflow through a flexible tube to a small, lightweight nozzle at the printhead. This keeps weight off the moving carriage while providing more cooling than any fan that could practically be mounted on it.
Pros: Extreme cooling capacity, low toolhead weight, very quiet
Cons: More complex installation, tube routing, costs $30-50+
Recommended Duct Designs by Printer
Ender 3 / Ender 3 V2 / Ender 3 S1
The HeroMe Gen7 system is the most versatile option. It supports single fan, dual 5015, and even CPAP configurations through a modular base and interchangeable fan mounts. The duct geometry is well-tested and provides excellent directed airflow.
For a simpler option, the Petsfang Bullseye duct with dual 5015 fans offers comparable cooling performance with an easier print and assembly process.
Bambu Lab P1S / P1P / X1C
Bambu printers ship with reasonably good cooling, but the P1 ColdFront duct (available on Printables) improves airflow distribution for better overhang performance. Since these printers use a proprietary fan connector, stick with the stock fan and just upgrade the duct.
Voron 2.4 / Trident
Most Voron builds use the Stealthburner toolhead, which has excellent cooling out of the box. If you need more, the Stealthburner with twin 4010 fans mod or a CPAP attachment provides additional capacity for high-speed printing.
Creality K1 / K1 Max
The K1 series uses a unique toolhead design. The K1 Aux Fan Duct redirects airflow more effectively than the stock design and is a straight print-and-swap upgrade.
How to Print Your Cooling Duct
Material Selection
This is important: do NOT print cooling ducts in PLA. The duct sits directly next to the hotend, and PLA’s low glass transition temperature (60°C) means it will deform over time from radiant heat. Use:
- PETG: The practical minimum. Glass transition ~80°C, easy to print.
- ABS/ASA: Better heat resistance (~100°C), but requires enclosed printing.
- PC (Polycarbonate): Best heat resistance for printing, overkill for most setups.
Print Settings for Ducts
- Layer height: 0.15-0.2mm for smooth internal surfaces (better airflow)
- Infill: 30-40% minimum — the duct needs to withstand vibration
- Walls: 3-4 perimeters for rigidity
- Supports: Yes, most ducts have internal channels that require support
- Orientation: Print in the orientation specified by the designer for best duct geometry
Wiring a Dual Fan Setup
Parallel Connection (Simplest)
For two identical fans replacing a single stock fan:
- Cut the connector from the stock fan (keep the motherboard end).
- Splice both new fan’s positive wires to the positive wire from the connector.
- Splice both negative wires to the negative wire.
- Use proper solder joints and heat shrink tubing — no twist-and-tape.
Important: Running two fans in parallel doubles the current draw. Most printer motherboards can handle this, but verify your fan header is rated for the combined current (typically 0.3-0.5A total for two 5015 fans).
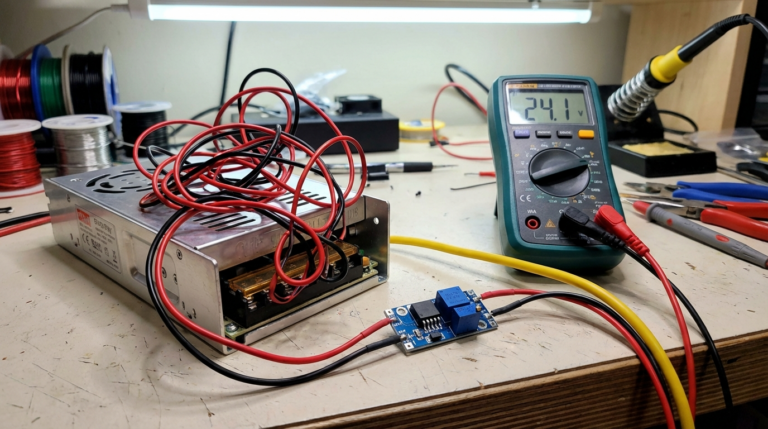
Using a Buck Converter (For 12V Fans on 24V Printers)
If you’re running a 24V printer but want to use 12V fans (which are more common and cheaper):
- Install a small buck converter between the fan header and the fans.
- Adjust the output to 12V.
- Connect fans in parallel to the buck converter output.
- PWM speed control will still work through the motherboard.
Testing and Calibrating Your New Cooling Setup
Overhang Test
Print a standard overhang test model (available on Printables — search “overhang test”). Compare results at 30°, 45°, 60°, and 70° overhangs before and after the upgrade. You should see significant improvement at 60°+ overhangs.
Bridging Test
Print a bridging test with spans of 20mm, 40mm, 60mm, and 80mm. With proper dual-fan cooling, clean bridges up to 60mm should be achievable with most filaments.
All-Around Cooling Check
Print a small cylindrical tower (10mm diameter, 50mm tall). With single-direction cooling, one side will look noticeably better than the other. With balanced dual-fan cooling, all sides should be consistent.
Common Mistakes to Avoid
- Printing ducts in PLA: They will deform. Use PETG minimum.
- Too much cooling for the first layer: Keep fans off or at 0% for the first 2-3 layers to maintain bed adhesion.
- Cooling ABS/ASA aggressively: These materials need minimal part cooling. Over-cooling causes warping and layer splitting. Your new super-cooling setup should be dialed back to 0-30% for these materials.
- Ignoring duct-to-nozzle gap: The duct outlet should be 2-5mm from the nozzle tip. Too far and airflow dissipates; too close and you risk collisions with the print.
- Blocking the hotend heatsink fan: Some duct designs can restrict airflow to the heatsink cooling fan. Ensure your hotend cooling is unobstructed — that fan prevents heat creep and is more important than part cooling.
Is It Worth the Upgrade?
Absolutely. A dual 5015 fan setup with a good duct is typically a $15-20 investment (fans + printed parts), takes an afternoon to install, and delivers the kind of improvement that’s immediately visible in every print. It’s consistently ranked among the top 3 most impactful 3D printer upgrades alongside bed leveling sensors and all-metal hotends.
If you’re tired of babysitting overhangs, adding unnecessary supports, or accepting rough bridges as “good enough,” a cooling upgrade is the single best thing you can do for your print quality.