How Long to Cure Resin Prints: Times, Methods, and Pitfalls (2026 Guide)
Why cure time is not a single number
How long to cure resin prints is the question every new SLA owner asks by their third print, and the honest answer is “it depends.” The first resin print I ever cured sat under a 405 nm UV station for forty minutes because I panicked and assumed “more is better.” It came out yellowed, brittle on the thin features, and the surface had crazing that should not have been there. The print before that one, which I cured for ninety seconds because I was impatient, was tacky to the touch a week later and visibly deformed under moderate load.
“How long to cure resin prints” does not have a universal answer because the correct cure time is a function of resin chemistry, part geometry, wavelength of the curing light, the UV power at the part surface, and the temperature during cure. What I can give you is a reliable process that lands in the right cure time every time, with concrete starting numbers for each common scenario.
The three-minute rule of thumb
For a standard small miniature (up to 50 mm tall) printed in a mid-viscosity 405 nm resin, in a Wash and Cure station or similar 40 W UV chamber, three minutes is almost always enough. I have cured hundreds of 28 mm gaming miniatures at this setting on three different machines and the overwhelming majority finish fully cured without yellowing or surface damage.
That single data point gets people pointed in the right direction. From there, every adjustment to part size, resin type, or curing station power moves the target time up or down. The table later in this article gives you those adjustments explicitly.
What “fully cured” actually means
A fully cured resin part has completed the photopolymerization reaction throughout its volume. The resin monomers have cross-linked into the polymer network. Under-cured parts are still partially monomeric — they release a stink, feel tacky, deform under load, and yellow rapidly in sunlight. Over-cured parts are often fine mechanically but suffer from surface changes: yellowing on clear resins, brittleness on thin features, and occasional crazing on large flat surfaces.
Two reliable indicators tell you the print is done:
- Surface feel: A fully cured part is dry to the touch with no tackiness, no ammonia/acrylic smell.
- Mechanical behavior: Thin features resist flexing without feeling rubbery. On a standard 1 mm test cube wall, the cure is complete when you can flex the wall and hear a sharp crack if you push far enough, rather than feeling it bend and stay bent.
Cure-time chart by scenario
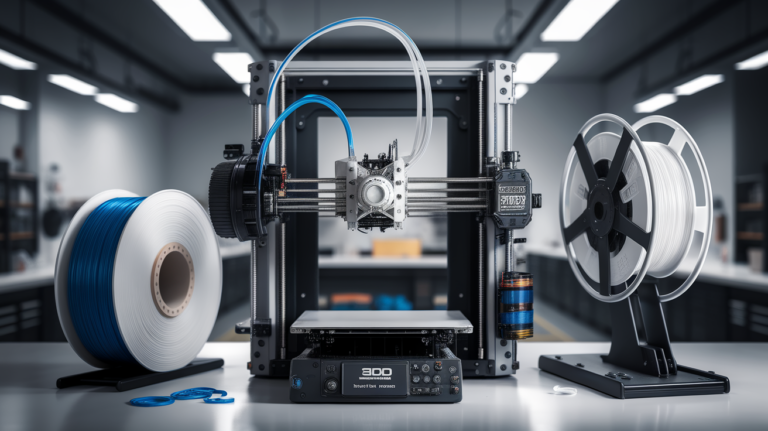
All times below assume a typical consumer Wash-and-Cure station (Anycubic Wash & Cure Plus, Elegoo Mercury Plus, Phrozen Cure Beam, or equivalent at 40-60 W). Times scale inversely with UV output: halve them for professional 120 W+ stations, double them for a single desk lamp conversion.
| Scenario | Standard 405 nm Resin | Tough / Engineering Resin | Flexible / Rubber Resin |
|---|---|---|---|
| Small miniatures (≤50 mm) | 2-3 min | 4-6 min | 1-2 min |
| Medium parts (50-100 mm) | 4-6 min | 8-12 min | 2-4 min |
| Large parts (100-200 mm) | 6-10 min | 12-20 min | 4-8 min |
| Thick-walled functional parts | 10-15 min | 20-30 min | 8-12 min |
| Dental / castable resin | Follow mfr spec exactly | — | — |
Why flexible resins cure faster than tough resins
This catches people off guard. Flexible resins, despite feeling rubbery, often require less UV exposure because their polymer network is designed to remain partially elastic — full cross-linking is intentionally limited. Tough and engineering resins, conversely, are designed to maximize cross-link density for strength, and they demand much longer UV exposure to reach that density.
Over-curing flexible resin makes it brittle and loses the rubbery character. Under-curing tough resin leaves you with a strong-looking part that snaps at a fraction of its rated load.
Water-cure versus air-cure
Submerging the part in water during cure improves surface finish and reduces yellowing. The mechanism is simple: oxygen inhibits surface photopolymerization, so the thin skin of a part cured in open air never fully cross-links. Submerging it in water excludes oxygen from the surface and lets the full reaction complete.
Downsides: you cannot water-cure every resin (some go milky or develop blush), and the wet surface can trap debris. I water-cure clear and translucent resins where surface clarity matters, and air-cure everything else.
Temperature effects nobody documents
UV cure is an exothermic reaction. A part sitting in a 40 W cure chamber warms up, and the warmer resin cures faster. In winter my basement runs 12°C; at that temperature a 3-minute cure gives a result closer to what a 2-minute cure looks like at 25°C.
If you live somewhere cold, two adjustments help:
- Warm the part first. Let the washed piece sit at room temperature for 15 minutes before curing.
- Increase cure time by 50%. Below about 18°C, I add at least 50% to the baseline time in the table.
Signs you have over-cured
Over-curing creeps up on resin printers because there is no immediate red flag. Watch for:
- Clear resins turning yellow (especially water-clear formulations).
- Thin features becoming brittle — a miniature’s banner snapping at the pole under light pressure.
- Visible surface crazing (fine network of surface cracks) on large flat areas.
- Warping and deformation hours after cure completed, as the internal stress field relaxes.
If you see any of these, halve the cure time on the next print.
Signs you have under-cured
Under-curing is the safer error for mechanical integrity but shows up as:
- Surface tackiness an hour after cure finished.
- Strong resin smell persisting from the part.
- Parts softening over days in sunlight.
- Thin features remaining rubbery rather than snappy-brittle.
If any of those are present, add 30% to your cure time and try again.
Cure station versus nail-lamp cure
Entry-level resin printers often ship paired with a “cure station” that is essentially a repurposed UV nail lamp. They work, but the UV output and wavelength are not matched to most resin formulations. Typical nail lamps run at 365 nm with lower output than dedicated cure stations. If you are using one, add 50-100% to the times in my chart above.
Dedicated stations like the Anycubic Wash & Cure Plus, Elegoo Mercury Plus V3, or Phrozen Cure Beam run at 405 nm with much higher wattage, rotate the part on a turntable for even exposure, and typically finish a miniature in 2-3 minutes. The ~$80 upgrade from a nail lamp to a proper cure station pays for itself within a couple of months in consistency alone.
If you cure a lot of large parts, a 120 W industrial UV station (Phrozen Sonic Mini Cure, or DIY builds with 405 nm LED strips) lets you cure 200 mm models in 5-8 minutes rather than 15-20. For hobby use that is overkill; for small-scale commercial printing it is a real time saver.
How to cure resin prints that have supports
If you cure a supported print, the supports will also cure and become brittle. Removing them afterward often leaves small stubs that are harder to clean than if you had removed the supports before cure. My standard workflow:
- Wash the print fully.
- Remove supports while the print is still in its partial-cure state (washed but not UV-cured). Resin is slightly flexible here — supports pop off cleanly with pliers and the attachment points are smooth.
- Sand or clean the attachment points now, not after cure.
- Then UV cure.
The alternative — curing first and removing supports second — works but leaves witness marks that need more sanding and occasionally chips out small features when supports snap hard.
The full post-processing timeline
Cure time is only part of the post-print workflow. The complete sequence that gives reliable results:
- Drain the build plate tilted for 2-3 minutes back into the vat.
- Wash for 3 minutes in 99% IPA or resin-specific washing solution. Longer wash leaches plasticizers from some resins.
- Dry for 5-10 minutes either on a rack or in the cure station with UV off. Critical: IPA inhibits cure if wet at cure start.
- Cure per the table above.
- Rest for 24 hours before any load test. Resin continues subtle cross-linking for up to 24 hours even after UV removal.
Batch curing mixed parts
If you have small and large parts in the same cure cycle, set time for the largest part. Over-curing small parts is less destructive than under-curing big ones (unless they are clear — shield clear minis under a cardboard divider to slow their exposure). For mixed resin types, cure in separate batches: you will waste five minutes of machine time, not ruin four prints.
Sun curing is possible but imprecise
Direct sunlight at solar noon in midsummer delivers enough UV to cure most 405 nm resins in 5-15 minutes. The trouble is that the UV flux varies hourly, daily, and seasonally, so reproducibility is terrible. I sun-cure cosplay parts I printed for one-time use and do not care about. For anything functional, use a cure station with known output.
When in doubt, go short and check
Under-curing can be fixed by adding more time. Over-curing cannot be undone. If you are printing a new resin or a new geometry, start at the short end of the table, inspect the part, and add time only if you see under-cure signs. That habit alone will save you more failed prints than any other post-processing adjustment.