How to Split 3D Models for Multi-Piece Printing of Large Objects
When You Need to Split a Model and When You Should Not
The instinct of many beginners is to never split a model — keep the print in one piece, treat splitting as defeat. That instinct is wrong. There are real cases where splitting produces a better result than printing whole: when the model exceeds the printer’s build volume, when an internal feature would require excessive support material to print upright, when print orientation forces a surface to be the bottom that should be a top, and when print time as a single piece exceeds 24 hours. In each of those cases, a thoughtfully split model produces a better final part faster than the monolithic alternative.
This guide walks through the splitting workflow: deciding whether and where to split, executing the split in software, designing the joining strategy (alignment pins, dovetails, magnets, glue), and the post-processing required to make the seam invisible. The techniques scale from a small object split into two pieces to full cosplay armor split into 20 panels.
Decide the Split Plan Before You Touch the Model
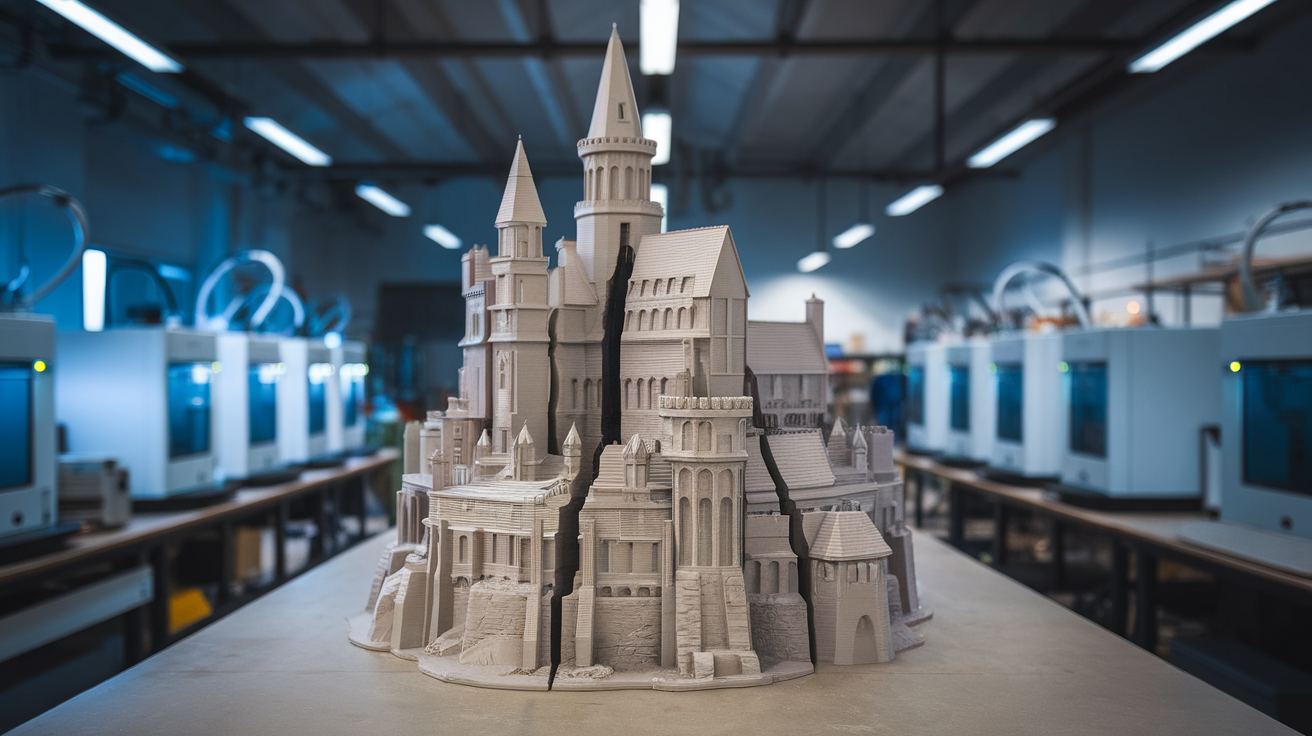
The most common mistake when splitting models is splitting along whatever surface the slicer’s split tool offers — typically a flat plane through the geometric center. This produces parts that are mechanically weak at the seam and visually obvious. The correct approach: examine the model and identify where natural geometric features hide a seam line, where structural loading is lowest, and where the resulting parts will print most efficiently. Common natural split locations:
- Along existing geometric edges: A model with a natural ridge, recess, or color change can be split along that edge — the seam becomes invisible because it follows existing geometry.
- At symmetry planes: A symmetric object split along its plane of symmetry produces two identical-shape parts that can be joined cleanly with the seam aligned to the model’s natural axis.
- Through low-stress regions: If the model has structural loading paths (a load-bearing cosplay shoulder pad, a functional bracket), avoid splitting through the load path. Split through low-stress flange regions instead.
- Where overhangs become bottoms: If a model has an awkward overhang that requires support, splitting at the overhang’s edge often allows both pieces to print without support — one piece’s overhang becomes the second piece’s bottom face.
Sketch the split plan on paper or in your CAD viewport before executing. A sketch takes 5 minutes and prevents the worst splitting mistakes.
Software Tools for Splitting
Several software options work for splitting models, with different trade-offs:
- Bambu Studio / PrusaSlicer (slicer-level split): Both slicers offer “Cut” tools that split a model along a plane defined in the viewport. Fast, no separate software needed. Limitation: the cut is always a flat plane — no curved or stepped cuts.
- Meshmixer (legacy but still works): The “Plane Cut” tool plus the “Edit > Plane Cut” with the angled normal vector lets you cut along any plane. The “Boolean Difference” with a custom geometry lets you cut along arbitrary surfaces. Free, mature, but no longer actively developed.
- Blender: The Boolean modifier with a custom mesh as the cutter geometry produces arbitrarily complex cuts — curved, stepped, or following a custom profile. Steeper learning curve. Free.
- Fusion 360 / OnShape (CAD software): If you have access to the model’s CAD source (not just an STL), splitting in CAD produces parametric, repeatable splits with clean dimensional accuracy. Best option if you have the model source files.
- Lychee Slicer (resin-focused but free): Has good model preparation tools including precise plane cuts. Worth considering if you also do resin work.
For most users, the slicer-level tools (Bambu Studio Cut, PrusaSlicer Split) handle 80% of cases. Reserve Blender or Meshmixer for cases where the slicer’s flat plane cut is inadequate.
Designing the Joining System
The split itself is half the design problem. The other half is how the pieces come back together. Five common joining systems with their trade-offs:
- Alignment pins (printed-in cylindrical pins): Add cylindrical pins on one piece, matching holes on the other. The pins maintain alignment during gluing and prevent the seam from sliding. Common dimensions: 3 mm diameter, 8–12 mm length. Easy to design, fast to print, works for almost any model. The default choice.
- Dovetail or trapezoidal interlocks: A dovetail-shaped tongue and slot prevent the parts from separating without sliding them apart. Stronger than pins for parts that will see lateral load. More complex to design but reduces or eliminates the need for adhesive.
- Magnets: Embedded neodymium magnets allow the parts to be assembled and disassembled. Useful for cosplay armor that needs to be removable for storage, or for prop weapons that disassemble for travel. Requires pause-to-insert during printing or post-print drilling.
- Threaded inserts: Heat-set brass inserts in one piece and matching machine screws through the other allow strong, repeatable mechanical assembly. Better than glue for parts that need to be serviced. Requires soldering iron and threaded insert sizing knowledge.
- Pure glue joints: Smooth, large-area glue surfaces with no alignment features. Fastest to design but most error-prone — alignment depends entirely on careful gluing. Acceptable for small flat-surface joins.
For a beginner: always include alignment pins or dovetails. Pure glue joints look easy but produce visible misalignment seams more often than not.
Print Settings for Split Parts
Parts that will be glued or mechanically joined need slightly different print settings than monolithic parts:
- Outer wall count: 3 walls minimum on glued surfaces. The wall thickness provides the gluing surface; thin walls produce weak glue joints.
- Wall print speed on glued faces: Reduce by 25%. The smoother walls bond better with cyanoacrylate or epoxy.
- Top/bottom layers on flat-glued surfaces: Increase to 5 layers. The flatness of the bonding face matters more than the print’s interior, and more top/bottom layers produce a flatter mating face.
- Avoid top-layer infill patterns showing through: Specifically for the gluing face, use 100% top fill density to prevent the infill pattern from appearing through to the bonding surface.
Glue and Adhesive Selection
The right adhesive depends on the filament and the joint geometry:
- PLA-to-PLA cyanoacrylate (super glue): The default. Bonds quickly, holds well for most uses, fills small gaps when used with a kicker accelerator.
- PETG-to-PETG: cyanoacrylate or two-part epoxy: CA glue works but the bond is weaker than PLA-CA. Two-part epoxy (5-minute or 24-hour cure) produces stronger joints. For load-bearing PETG joints, use epoxy.
- ABS / ASA: acetone slurry: Brush a small amount of acetone on the joint surfaces; the polymer dissolves slightly and the parts bond chemically when pressed together. Stronger than any glue. Available only for ABS/ASA — does not work on PLA or PETG.
- Mixed-material joints (PLA to PETG, etc.): Two-part epoxy is the only reliable option. CA glue forms weaker bonds across material types.
- Joints that need flexibility: Flexible silicone adhesive or cyanoacrylate-flex (rubber-modified CA). Standard CA produces a brittle joint that fails when flexed.
Hiding the Seam Post-Print
Even with careful splitting, the seam is usually visible. The post-processing options:
- Sanding: 400-grit followed by 800-grit on the seam line. Gradually levels the joint until it disappears. Works on PLA and PETG; harder on TPU.
- Body filler / spot putty: Apply a thin layer over the seam, sand smooth. Used by cosplay builders. Bondo Glazing & Spot Putty is the standard choice.
- Primer-and-sand: Apply primer (Rust-Oleum Filler Primer or Tamiya Surface Primer), sand smooth between coats, repeat 3–4 times. The primer fills small gaps and the sanding levels the seam.
- Heat-blending (ABS/ASA only): A brief acetone vapor exposure smooths the surface and visibly reduces seam visibility. Safety: requires ventilation.
- Paint matching: If the part will be painted, even a visible seam can be hidden under a painted color coat. Most cosplay armor is finished this way.
The level of seam-hiding effort should match the project’s visibility requirements. A functional jig does not need invisible seams; a display piece or cosplay armor benefits from full filler-and-paint treatment.
Common Mistakes With Multi-Piece Printing
Several patterns that look reasonable on first inspection but cause trouble in practice:
- Splitting into too many pieces: Every additional split adds an alignment surface and a potential failure point. A 4-piece split is almost always more reliable than a 12-piece split. Resist the urge to optimize each individual part’s print orientation if it requires excessive splitting.
- Using the slicer’s default plane through the model center: The center is rarely the best split location. Examine the model first.
- Skipping a test fit before gluing: Print all the parts, dry-fit them, identify alignment issues, and only glue when you are confident the assembly works. Once glued, mistakes are hard to fix.
- Not orienting splits with print direction in mind: A split that produces a part requiring excessive support material is worse than no split at all. Plan splits to put the bonding face down on the bed when possible.
- Ignoring tolerance on pin/hole pairs: Pins printed at exactly 3.0 mm into holes printed at exactly 3.0 mm will not fit. Add 0.15–0.2 mm tolerance to one side.
The Quick Reference Workflow
Pulling it all together — the workflow for splitting a model in 2026:
- Look at the model and identify natural geometric features that can hide a seam.
- Sketch the split plan on paper before opening any software.
- Use the slicer’s built-in cut tool for simple flat splits; use Blender or CAD for complex geometry.
- Design alignment pins or dovetails into the split — never rely on glue alone for alignment.
- Print parts with slightly thicker walls and top/bottom layers on bonding surfaces.
- Choose adhesive based on filament type — CA for PLA, epoxy for PETG, acetone for ABS/ASA.
- Sand and prime the seam if appearance matters; skip if it does not.
For details on specific large-format projects that benefit from splitting, see our best 3D printer for large-format prints 2026. For cosplay-armor-specific splitting techniques, our 3D printing cosplay armor build guide walks through full-body armor splitting in detail.