How to Use OctoPrint for 3D Printer Remote Monitoring: Complete Setup Guide
What Is OctoPrint and Why Should You Use It?
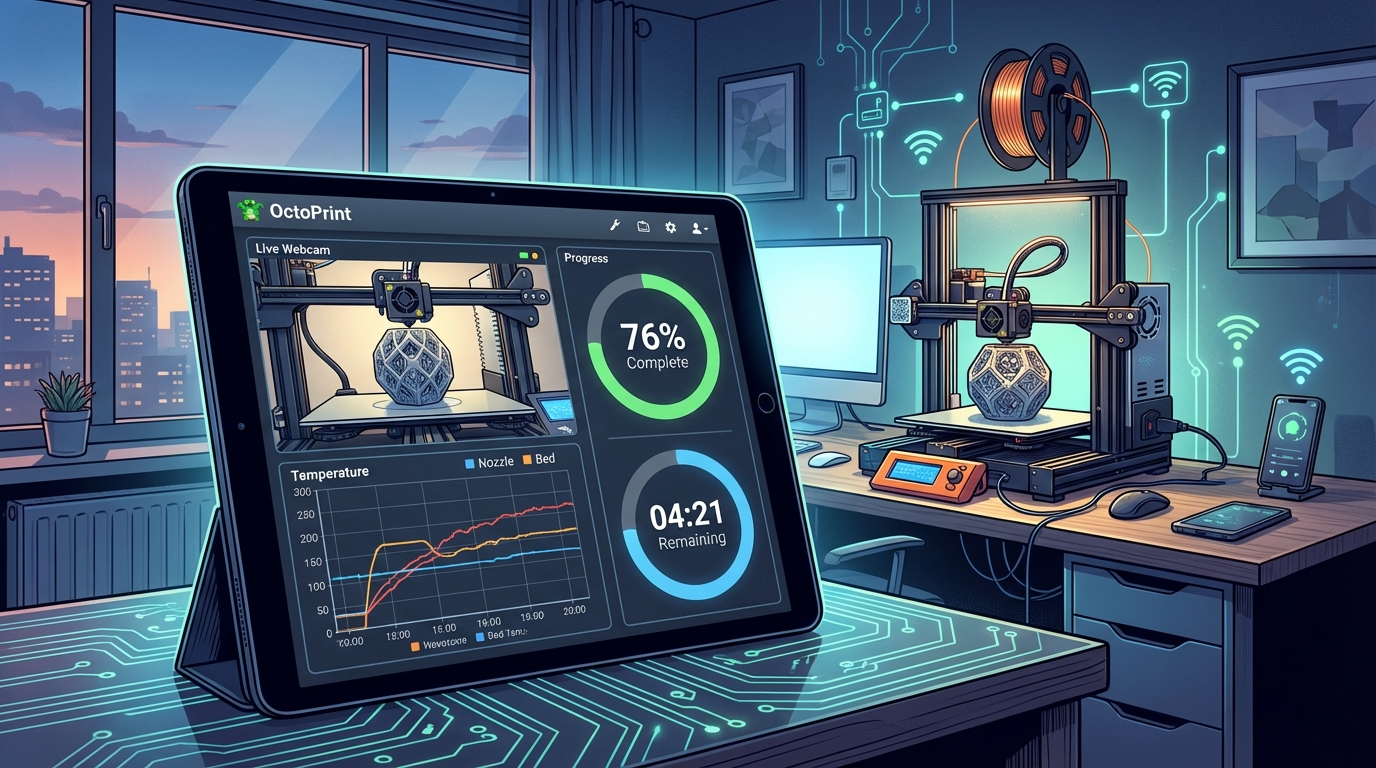
OctoPrint is a free, open-source web interface that lets you control and monitor your 3D printer from any device with a browser. Instead of shuffling SD cards back and forth or being chained to your printer’s tiny screen, you can start prints, adjust settings, and watch a live camera feed from your phone, laptop, or even another country.
Think of it as turning your basic 3D printer into a smart, network-connected machine — without spending hundreds on a printer that has those features built in. It runs on a Raspberry Pi connected to your printer via USB, and it’s been the go-to remote printing solution since 2013.
What You’ll Need
Hardware Requirements
- Raspberry Pi 3B+ or newer (Pi 4 recommended for best performance). A Pi Zero 2 W works but can be sluggish with plugins and camera streaming.
- MicroSD card: 16GB minimum, 32GB recommended. Class 10 or faster.
- Power supply: Official Raspberry Pi power supply recommended (5V/3A for Pi 4). Underpowered supplies cause random disconnections.
- USB cable: To connect the Pi to your printer. Match the connector type for your printer (USB-B for older printers, USB-C or Micro-USB for newer ones).
- USB webcam or Pi Camera Module (optional but highly recommended for remote monitoring).
- Case for the Pi (optional but protects it from filament debris and accidental shorts).
Software
- OctoPi: A pre-configured Raspberry Pi OS image with OctoPrint installed. This is the easiest way to get started.
- Raspberry Pi Imager: Free tool to flash OctoPi onto your SD card.
Step-by-Step Setup Guide
Step 1: Flash OctoPi to Your SD Card
- Download and install Raspberry Pi Imager on your computer.
- Insert your microSD card into your computer.
- In Raspberry Pi Imager, click “Choose OS” → “Other specific-purpose OS” → “3D printing” → “OctoPi” → select the latest stable version.
- Click “Choose Storage” and select your SD card.
- Important: Click the gear icon (⚙️) before writing to configure:
- Enable SSH (so you can access the Pi’s terminal remotely)
- Set a username and password
- Configure your WiFi network name and password
- Set your locale and timezone
- Click “Write” and wait for the process to complete.
Step 2: First Boot and Connection
- Insert the SD card into your Raspberry Pi.
- Connect the Pi to power — it will boot automatically.
- Wait 2-3 minutes for the initial boot to complete.
- On your computer or phone, open a browser and navigate to
http://octopi.local. If that doesn’t work, find the Pi’s IP address from your router’s admin page and use that instead. - You should see the OctoPrint setup wizard.
Step 3: Run the Setup Wizard
The first-time setup wizard walks you through essential configuration:
- Access Control: Create an admin username and password. Don’t skip this — anyone on your network could control your printer otherwise.
- Anonymous Usage Tracking: Your choice. The data helps OctoPrint development.
- Connectivity Check: Verifies your Pi can reach the internet (needed for plugin updates).
- Plugin Blacklist: Enable this to automatically block known-problematic plugins.
- Printer Profile: Enter your printer’s build volume, nozzle diameter, and number of extruders. This information helps OctoPrint display accurate previews.
Step 4: Connect Your Printer
- Connect your printer to the Pi via USB cable.
- Power on your printer.
- In OctoPrint’s web interface, go to the Connection panel (left sidebar).
- Select the serial port (usually
/dev/ttyUSB0or/dev/ttyACM0). - Set baudrate to “Auto” or 115200 (the most common setting).
- Click “Connect.” The status should change to “Operational.”
Setting Up a Camera for Remote Monitoring
USB Webcam (Easiest)
Most USB webcams work out of the box with OctoPi. Simply plug the webcam into one of the Pi’s USB ports and refresh the OctoPrint interface. The webcam stream should appear in the “Control” tab.
Recommended budget webcams for OctoPrint:
- Logitech C270: $20, 720p, excellent Linux compatibility
- Logitech C920: $50, 1080p, better image quality
- Any generic 720p USB webcam: Most work fine for monitoring purposes
Raspberry Pi Camera Module
The Pi Camera Module connects via the CSI ribbon cable and offers better performance than USB webcams with lower CPU overhead. The Pi Camera Module 3 provides autofocus, which is great for close-up monitoring of the nozzle and first layer.
Camera Positioning Tips
- Mount the camera at a 30-45° angle looking down at the print bed for the best view of print progress.
- Ensure adequate lighting — LEDs strip along the frame work well and are cheap.
- Keep the camera away from the heated bed’s convection zone to avoid foggy footage.
- Use a flexible arm mount (goose neck style) for easy repositioning.
Essential Plugins to Install
Must-Have Plugins
- OctoLapse: Creates beautiful time-lapse videos of your prints by coordinating camera snapshots with print head position. The results look like magic — the print appears to grow without any visible toolhead movement.
- PrintTimeGenius: Far more accurate print time estimates than the built-in calculator. It learns from your actual print history.
- Themeify: Dark mode and UI customization. Your eyes will thank you for late-night monitoring sessions.
- OctoPrint-Telegram or OctoPrint-Discord: Sends notifications to your phone when prints start, finish, or fail. Includes camera snapshots.
- Bed Level Visualizer: If your printer has a bed leveling probe, this plugin shows a 3D mesh of your bed topology. Incredibly useful for diagnosing adhesion issues.
Safety Plugins
- Obico (formerly The Spaghetti Detective): AI-powered failure detection that watches your camera feed and can automatically pause prints when it detects failures. Paid service with a free tier for one printer.
- Emergency Stop Button: Adds a prominent emergency stop button to the OctoPrint interface.
- Enclosure Plugin: If you have a temperature sensor in your enclosure, this monitors ambient temperature and can trigger alarms or shut down the printer if temperatures exceed safe limits.
Slicing and Uploading Files
Direct Upload from Slicer
Most modern slicers support direct upload to OctoPrint:
- Cura: Install the OctoPrint Connection plugin (built-in). Add your OctoPrint URL and API key in Preferences.
- PrusaSlicer / OrcaSlicer: Add an OctoPrint printer under Printer Settings → Host Type. Enter the URL and API key.
- After slicing: Instead of “Export G-code,” click “Send to OctoPrint” to upload and optionally start printing immediately.
Finding Your API Key
Go to OctoPrint Settings (wrench icon) → API → Copy the “Global API Key.” You’ll need this for slicer integration and mobile apps.
Remote Access Outside Your Home Network
Option 1: Obico (Recommended for Beginners)
Obico provides a secure cloud tunnel to your OctoPrint instance. After installing the Obico plugin, you can access your printer from anywhere through the Obico website or mobile app. The free tier includes one printer with basic remote access and AI failure detection.
Option 2: VPN (Most Secure)
Set up a VPN server on your home network (using WireGuard or OpenVPN on your router or the Pi itself). Connect to your VPN from anywhere, then access OctoPrint at its local address. This is the most secure option but requires more technical setup.
Option 3: Tailscale (Easy VPN)
Tailscale is a zero-configuration VPN that creates a mesh network between your devices. Install it on the Pi and on your phone/laptop, and you can access OctoPrint from anywhere as if you were on your home network. Free for personal use.
⚠️ What NOT to do: Never expose OctoPrint directly to the internet by port forwarding. There is no built-in encryption or brute-force protection. People have had their printers hijacked and started printing unauthorized objects (or worse, had their printers turned on to maximum temperature).
Troubleshooting Common OctoPrint Issues
Serial Connection Drops
The most common issue. Usually caused by:
- Underpowered USB supply: Use the official Pi power supply and a quality USB cable.
- USB cable quality: Some cheap cables are charge-only and lack data lines. Try a different cable.
- Electrical interference: Route the USB cable away from stepper motor wires and the heated bed wiring.
- Firmware timeout: Some printers disconnect if they don’t receive commands for a period. Enable the “Keep alive” option in OctoPrint’s serial connection settings.
Webcam Not Showing
- SSH into the Pi and run
lsusbto verify the webcam is detected. - Check that the webcam stream URL is correct in OctoPrint settings (default:
/webcam/?action=stream). - Some webcams need the
camera-streamerstack instead ofmjpg-streamer. OctoPi 1.0+ uses camera-streamer by default.
Slow Interface / Laggy Camera
- Reduce webcam resolution to 720p or 480p — 1080p is usually unnecessary and taxes the Pi’s CPU.
- Disable unnecessary plugins — each plugin consumes RAM and CPU cycles.
- If using a Pi 3, consider upgrading to a Pi 4 for significantly better performance.
OctoPrint vs. Built-In WiFi: Is It Still Worth It?
Many newer printers (Bambu Lab, Creality K1 series, AnkerMake) ship with built-in WiFi and companion apps. So is OctoPrint still relevant?
Yes, if:
- Your printer doesn’t have built-in connectivity
- You want more control and customization than manufacturer apps offer
- You want AI failure detection via Obico
- You need time-lapse creation (OctoLapse is still the best)
- You want to integrate with home automation (OctoPrint has an API that works with Home Assistant)
Maybe not, if:
- Your printer already has an excellent companion app
- You just need basic remote start/monitor functionality
- You don’t want to maintain another device (Pi needs occasional updates)
Getting Started Today
The total cost for an OctoPrint setup is roughly $50-75 (Pi 4 + SD card + power supply + basic webcam), and you can have it running in under an hour. For the convenience of never touching an SD card again, monitoring prints from anywhere, and having access to hundreds of community plugins, it’s one of the best investments in the 3D printing hobby.
Start with the basic setup, add plugins gradually as you discover what you need, and enjoy the freedom of wireless 3D printer management.