Modular Cosplay Armor in 2026: Snap-Fit Pauldron and Gauntlet for Fast Convention Changes
Why Modular Armor Beats One-Piece Builds
A one-piece cosplay armor build is a great show piece and a logistics problem. The wearer commits to a single character for the entire convention, the armor has to travel as one fragile assembly, and any panel that cracks in transit takes the whole costume out of rotation. Modular armor — armor designed as a system of snap-fit, magnet, or strap-attached panels — solves all three problems and adds a fourth benefit: the same pauldron platform can carry three different decorative shells, so a single shoulder build does triple duty across multiple costumes.
This guide is the 2026 modular cosplay armor build playbook focused on the two most demanding panels: the pauldron (shoulder armor) and the gauntlet (forearm armor). Both pieces flex during wear, both attach to non-rigid body geometry, and both are where most home-built modular systems fail. Getting these two right makes the rest of a modular armor system straightforward.
Attachment Method: Snap-Fit Versus Magnet Versus Strap
The first design choice is the panel attachment system that lets a printed shell mount to a base layer (under-suit, body harness, or padded liner) without tools. Three families work in 2026, each with its own trade-offs.
Snap-fit attachment uses a printed cleat on the back of the decorative shell that engages a matching socket on the base layer. The engagement is positive (the panel locks into place with a tactile click), the assembly is fast (under five seconds per panel), and no separate hardware is required. The downside is that snap-fit cleats are the highest-stress geometry in the whole build and crack first when the cosplayer falls or bumps the shoulder against a door frame. Snap-fit cleats need to be printed with 4-5 perimeters, gyroid infill at 25 percent, and aligned so the layer lines do not coincide with the load axis.
Magnet attachment uses recessed 8-12 mm rare-earth magnets in both the shell and the base layer. The engagement is quick and the failure mode is benign — the panel separates rather than cracks under impact, which means the cosplayer ends the day with a few scuffed magnet pockets rather than a shattered pauldron. The downside is reduced retention force; a pauldron held by four 10 mm magnets carries roughly 15-20 kg of pull before separating, which is enough for normal wear but not for active poses or photo shoots that involve arm movement above the head.
Strap attachment uses elastic or nylon webbing routed through slotted channels in the back of the shell, tied to a body harness. Straps are the most secure of the three methods and the most invasive — they require building the under-suit around the armor system rather than treating the under-suit as an independent garment. For larger panels (chest plate, back armor) straps are the right answer; for shoulder and forearm panels, the strap system tends to over-build the harness for the payload.
The build pattern that works best in 2026 for modular pauldrons and gauntlets is hybrid: primary attachment by magnet (fast, fail-soft) backed by a low-tension safety strap that catches the panel if the magnets separate during an unusual movement. The strap stays slack during normal wear and only carries load if the magnets release.
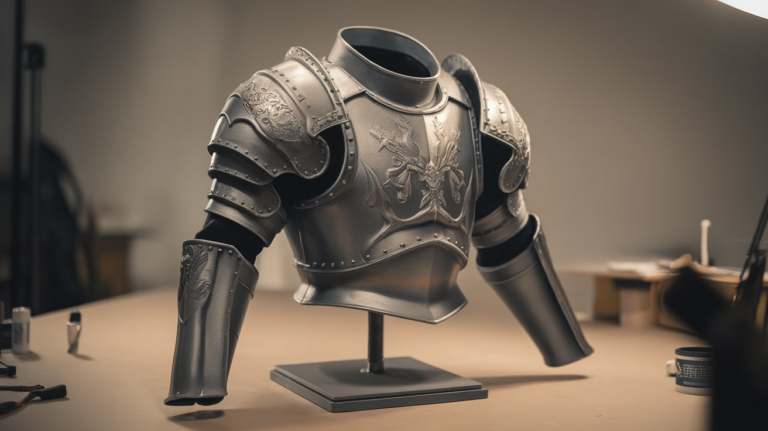
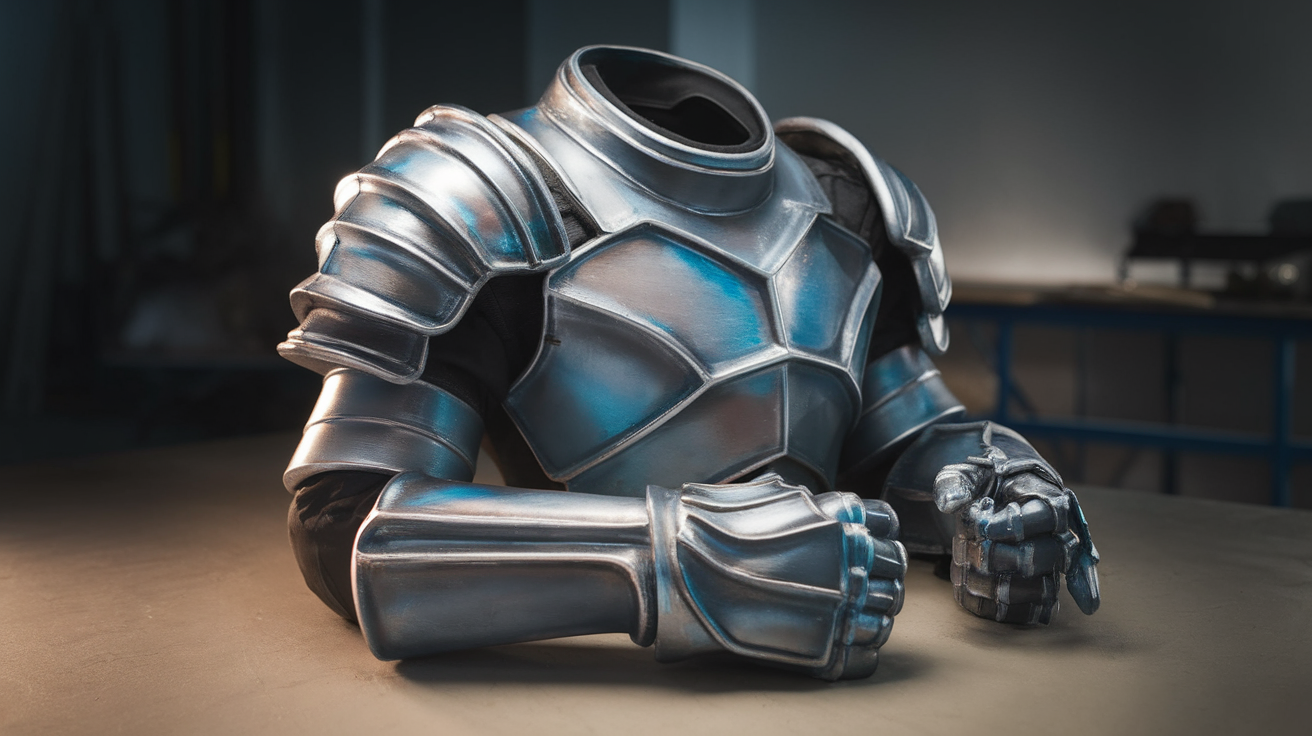
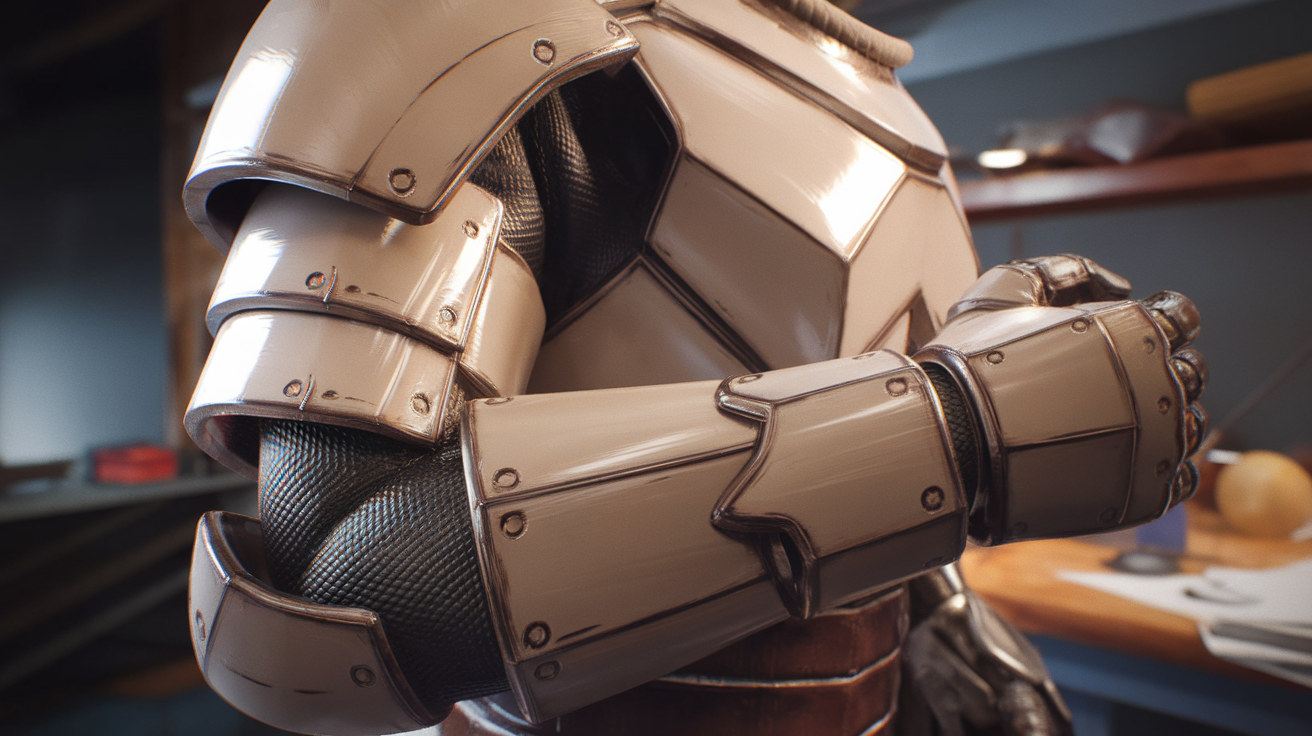
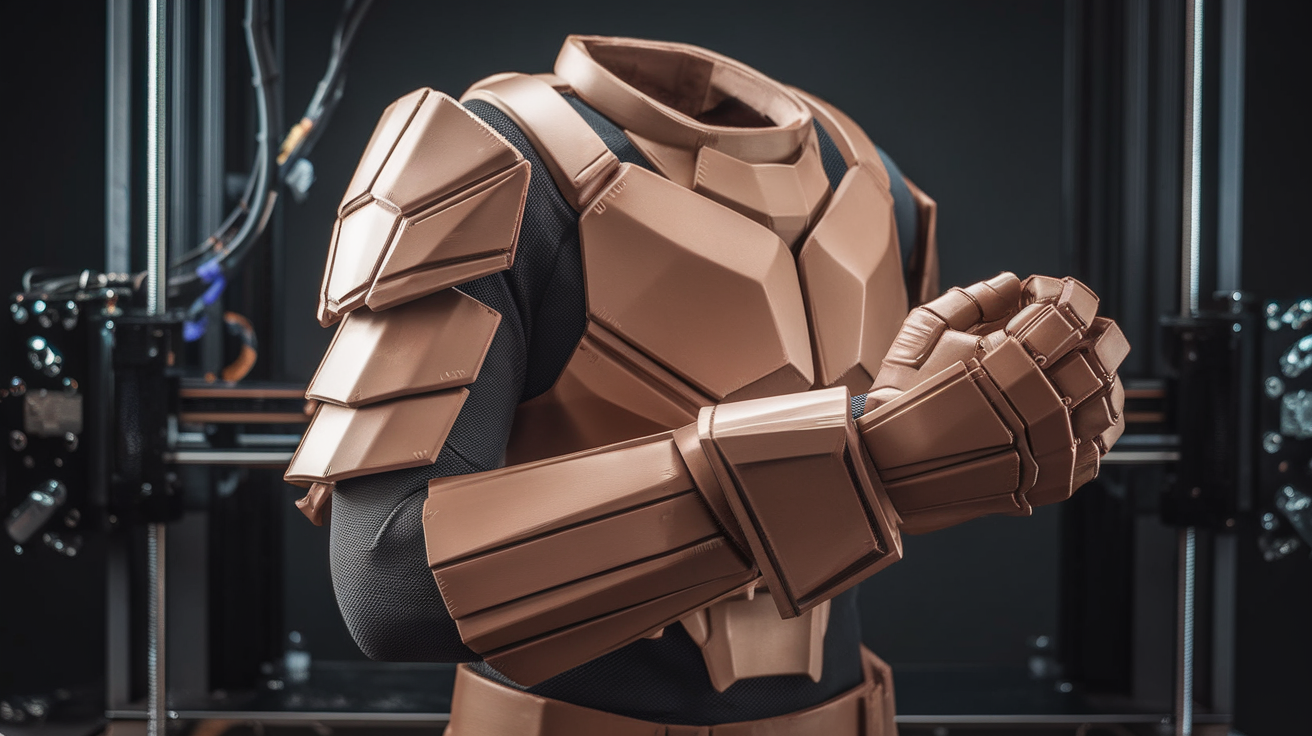
Pauldron Design: Shoulder Dome and Segment Overlap
A shoulder is the hardest body region to armor because it has the largest range of motion of any joint in the body. A rigid one-piece pauldron either restricts arm motion (preventing the cosplayer from posing with arms above the head, which is the most common photography request) or sits awkwardly when the arm is at rest. The standard fix is a segmented pauldron: a dome that covers the shoulder cap, plus two to four overlapping segments that hang from the dome and slide over each other as the arm moves.
The overlap geometry matters. Each segment needs to overlap the next by 15-20 mm so that when the arm is fully raised, no body-side fabric becomes visible between segments. The segments are connected to the dome by short straps or hidden hinge pins printed into the back of each segment. The dome itself attaches to the body harness through the magnet-and-strap hybrid described above.
Print orientation for the dome is print-flat with the inside facing up; this gives the smoothest outer surface for finishing and keeps support material off the visible side. Segments are printed standing on their narrow edge with tree supports under the curl. Both pieces print successfully in PLA or PLA-Lite at 0.2 mm layers; the finishing sand-prime-paint workflow erases the layer-line difference between print orientations.

Gauntlet Design: Forearm Clamshell with Elbow Hinge
The forearm has less range of motion than the shoulder but more circumferential variability — the diameter of the forearm changes by 25-40 mm between the wrist and the elbow. A rigid one-piece gauntlet either binds at one end or gaps at the other. The standard modular gauntlet is a clamshell: two half-cylinders that mate along the inside of the forearm, hinge at the elbow, and lock with magnets or snap-fit cleats along the outside.
The clamshell halves are printed individually, glued or pinned to a fabric or leather inner liner that handles the bending stress, and lined with foam padding at the wrist and elbow ends. The hinge at the elbow is the highest-wear part of the build and benefits from a print-in-place pin hinge with 0.25 mm clearance rather than a glued or pinned external hinge. Print-in-place hinges save build time, eliminate the failure mode of pin migration, and read as more mechanical in close-up photography.
The lock on the outside of the forearm is typically a single 12 mm magnet pair backed by a hidden elastic loop that catches the gauntlet if the magnet releases during wear. For gauntlets designed for live combat or LARP use, replacing the magnet with a screw-down knob or a buckle is appropriate; for convention wear the magnet is the right pick.
Padding, Comfort, and the Four-Hour Test
A piece of cosplay armor that looks great in photos and is unwearable after four hours fails the convention test. Padding is the difference between a wearable build and a photo-only build. The rule of thumb is that any hard edge that touches the body needs at least 6 mm of closed-cell foam between the shell and the skin, glued to the inside of the shell at the contact point.
The contact points to pad on a pauldron are the front shoulder cap (where the dome rests on the trapezius muscle) and the inside back of the dome (where the harness anchor sits against the shoulder blade). The contact points to pad on a gauntlet are the wrist end (where the print edge presses on the styloid process of the radius) and the inside of the elbow joint (where the hinge geometry meets the inside elbow crease).
Closed-cell EVA foam at 5-8 mm thickness in a 35-40 kg/m^3 density is the standard padding material in 2026. It glues to PLA and PETG with contact cement or hot melt adhesive, holds shape over repeated convention wear, and does not absorb sweat the way open-cell foam does. Open-cell foam is the wrong material for cosplay padding — by day three of a convention an open-cell-padded pauldron smells terrible and the foam compresses to a fraction of its original thickness.
Print Orientation and Support Strategy
The print orientation choices for modular armor panels are not arbitrary; they affect both finish quality and structural strength. Pauldron domes and gauntlet halves should be printed concave-side-up (inside facing the print bed) so that the outer surface is built layer-by-layer in stacked rings rather than supported. This produces the smoothest possible outer surface and concentrates layer lines on the inside, where they are hidden by padding.
Tree supports are the right choice for the curl at the edges of pauldron segments. The trees touch the print at small, easily-removable contact points rather than the dense walls that grid supports leave behind. Tree support density at 1 percent and contact distance at 0.15 mm produces supports that snap off cleanly with light finger pressure after the print finishes.
For gauntlets with print-in-place hinges, the print orientation has to keep the hinge axis parallel to the build plate. Printing a hinge with the axis vertical produces a hinge that seizes on the first attempted motion because the layer-line resolution is on the load axis. Horizontal hinges print and articulate cleanly on every desktop printer tested through 2026.
Repair Workflow When a Panel Cracks
The whole point of modular armor is that a damaged panel does not take down the whole costume. The repair workflow needs to be documented in advance — having the spare prints, the bonding agent, and the painted-spare segment ready before the convention starts means a panel crack on day two is a 20-minute fix in the hotel room rather than a costume retire.
The right prep is to print one spare of every panel that sees high stress — one extra pauldron segment, one spare gauntlet half, one spare attachment cleat. The spares get painted alongside the originals so the finish matches. Each spare gets stored in a labelled foam-padded bag in the convention luggage. The travel kit includes a small bottle of cyanoacrylate (super glue) for emergency in-place repairs and a tube of two-part epoxy for repairs that need to survive the rest of the convention.
Most panel breaks happen at the attachment cleats during assembly or disassembly. Designing cleats to be replaceable rather than integral — printing them as separate parts that screw or snap into the back of the panel — means a broken cleat is a five-minute fix without any visible damage to the painted shell.