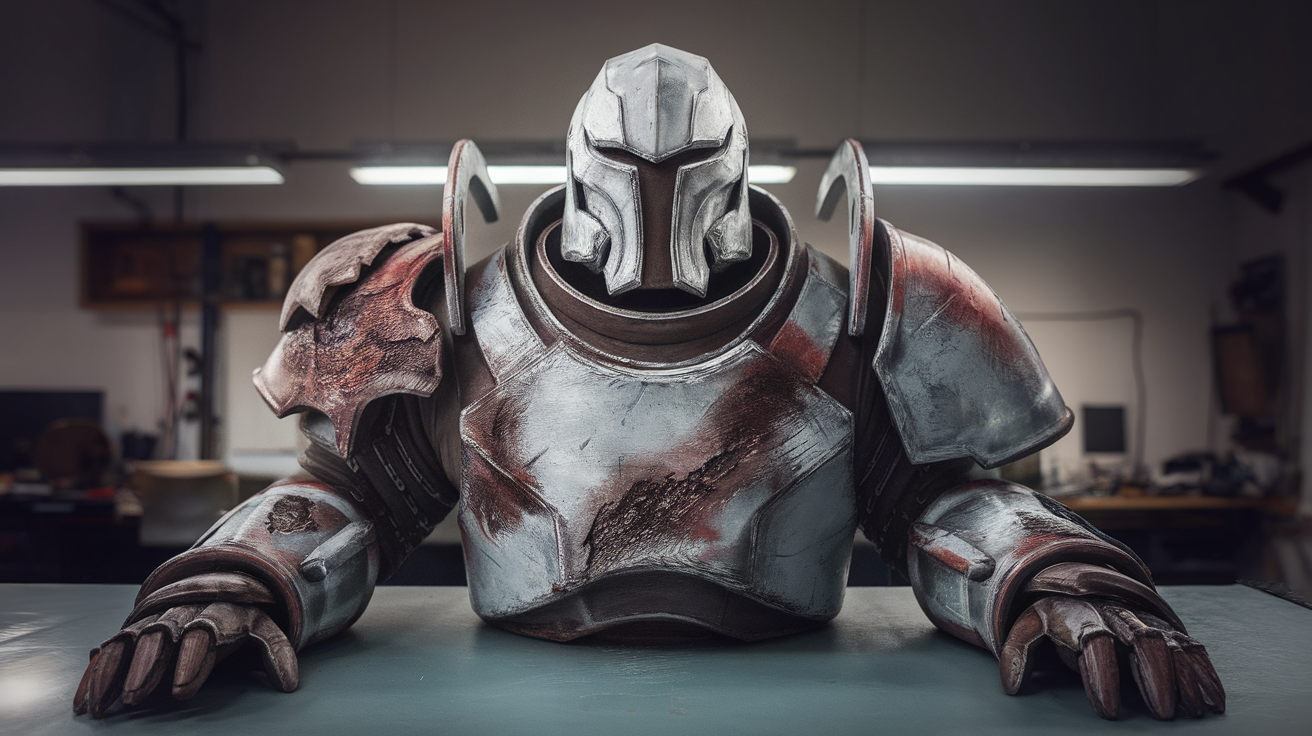
Cosplay 3D Printed Armor Weathering and Battle Damage Techniques 2026
Why an Unweathered Cosplay Print Always Looks Like Plastic
The 3D printed cosplay armor that wins photo competitions is rarely the one with the cleanest surface finish. The winning suit is the one that reads as a real object that has been worn, fought in, scratched against doorframes, and rained on. Unweathered cosplay armor — even when it has been printed flawlessly, sanded smooth, and base-coated with care — almost always reads to the camera as “person wearing plastic.” Weathering is the technique that converts a clean print into a believable prop, and in 2026 the toolset for weathering FDM and resin parts has matured into something a hobbyist can learn in a weekend.
This guide covers the weathering techniques that work specifically on 3D printed armor, with attention to the surface differences between FDM and resin parts that make some traditional miniature-painting techniques translate poorly. We assume you have already printed and base-coated the armor; the techniques below are the layer between base coat and final clear coat that turns a print into a prop.
Plan the Weathering Story Before You Pick Up a Brush
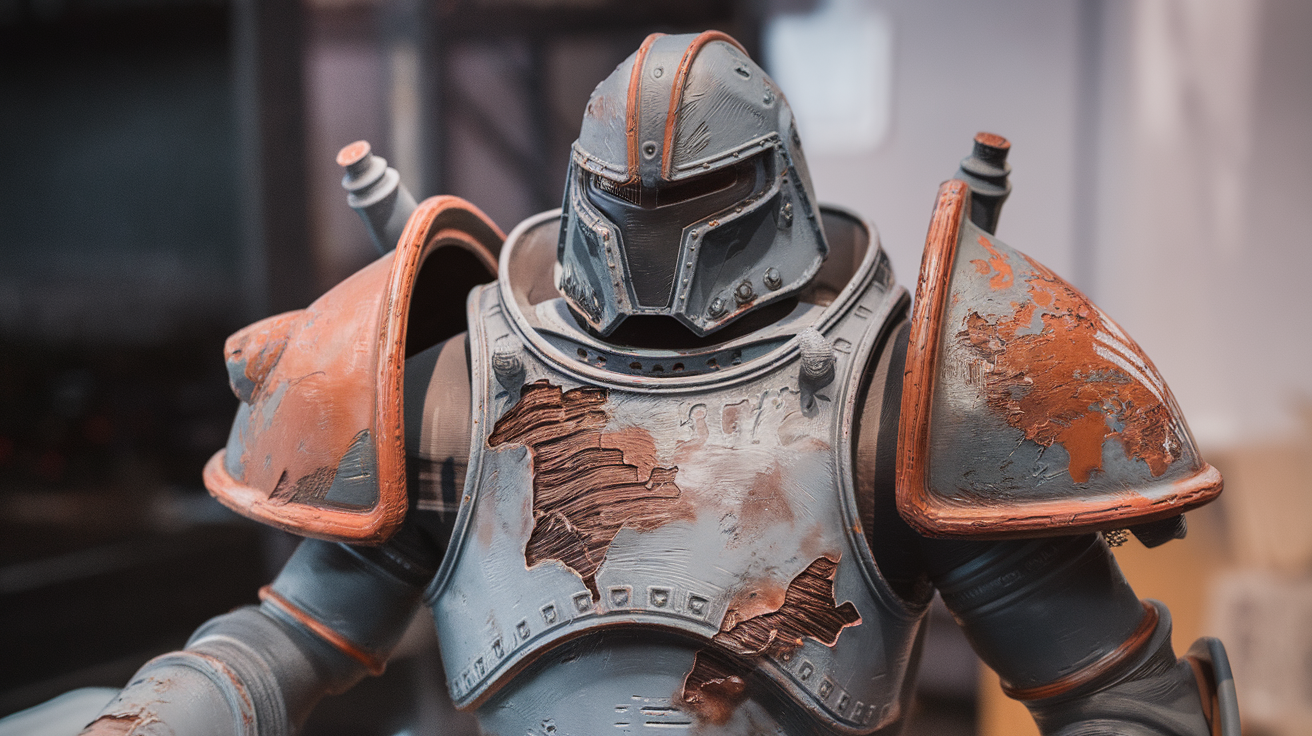
The most common mistake new cosplay weatherers make is applying every technique to every panel, producing armor that is uniformly damaged. Real wear is location-specific: knees and elbows take the most contact damage, shoulders and helmet crests catch overhead scrapes, the leading edges of pauldrons and gauntlets see the most friction wear, and the bottom inch of greaves picks up dust and dirt. Mapping the wear story onto your armor before painting means deciding which panels will be heavily weathered, which will be lightly weathered, and which will stay mostly clean. The contrast between worn and unworn areas is what reads as authenticity.
For a typical full-body suit, plan for one or two “hero” panels that take the most weathering attention (usually a chestplate or helmet front), four to six “supporting” panels that get medium weathering (pauldrons, gauntlets, greaves), and the remaining panels at light weathering. This three-tier approach distributes effort and produces visual hierarchy that the eye reads as natural.
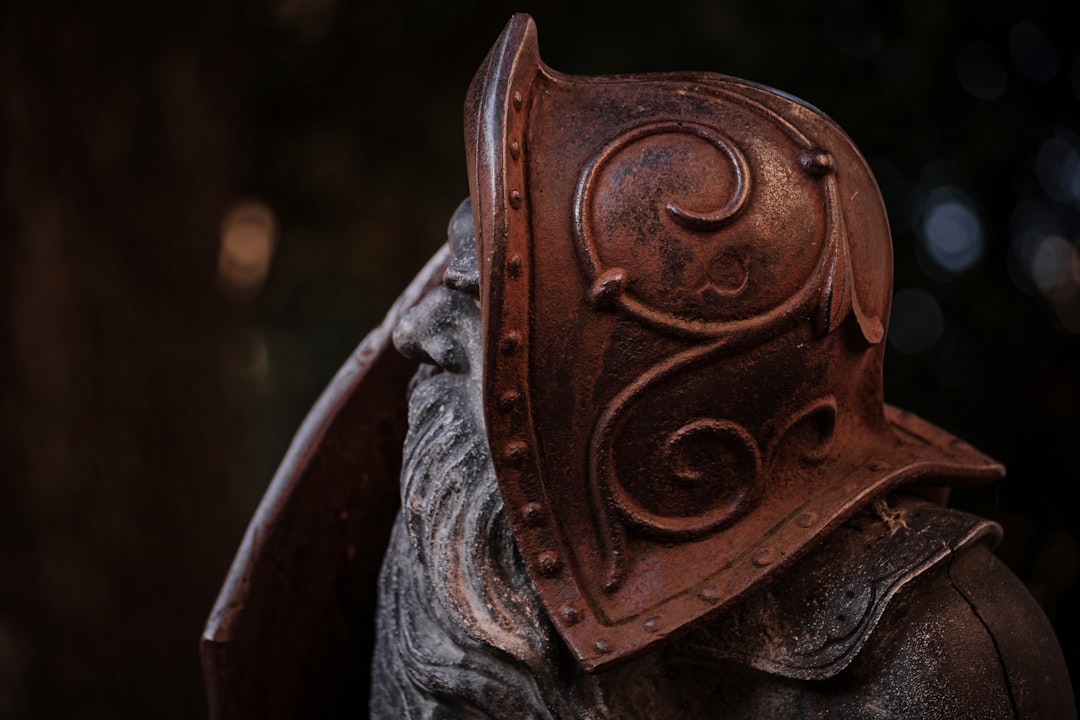
Edge Highlighting — The Technique That Does the Most Work
Edge highlighting — applying a lighter color to the raised edges of armor panels — is the single technique that makes cosplay armor read as three-dimensional from a distance. The method is simple in concept: take a slightly lighter version of the base color (or for metal armor, a metallic silver or chrome), load a small flat brush with a tiny amount of paint, wipe most of it off on a paper towel, and drag the nearly-dry brush across the raised edges of every panel. The paint deposits only where the brush contacts the highest surfaces, leaving recesses untouched.
For FDM armor, the layer lines along the edges actually help this technique — they catch the drybrush load slightly differently than smooth edges, producing texture that reads as honest wear rather than synthetic uniformity. For resin armor with smooth edges, edge highlighting reads more cleanly but takes more practice; the brush load needs to be even drier to avoid leaving streaks. Practice on a sacrificial print before working on the hero piece.
The lightness of the edge highlight matters. For dark base colors (black, navy, deep brown), the highlight should be 20-30% lighter than base. For metallic base colors, a true silver or chrome works well as a highlight, applied lightly. For light base colors (cream, white, light gray), the highlight should be either a slightly warmer or slightly cooler shade rather than a pure lightness shift, which reads as bleached rather than worn.
Sponge Chipping — The Method That Looks Most Real
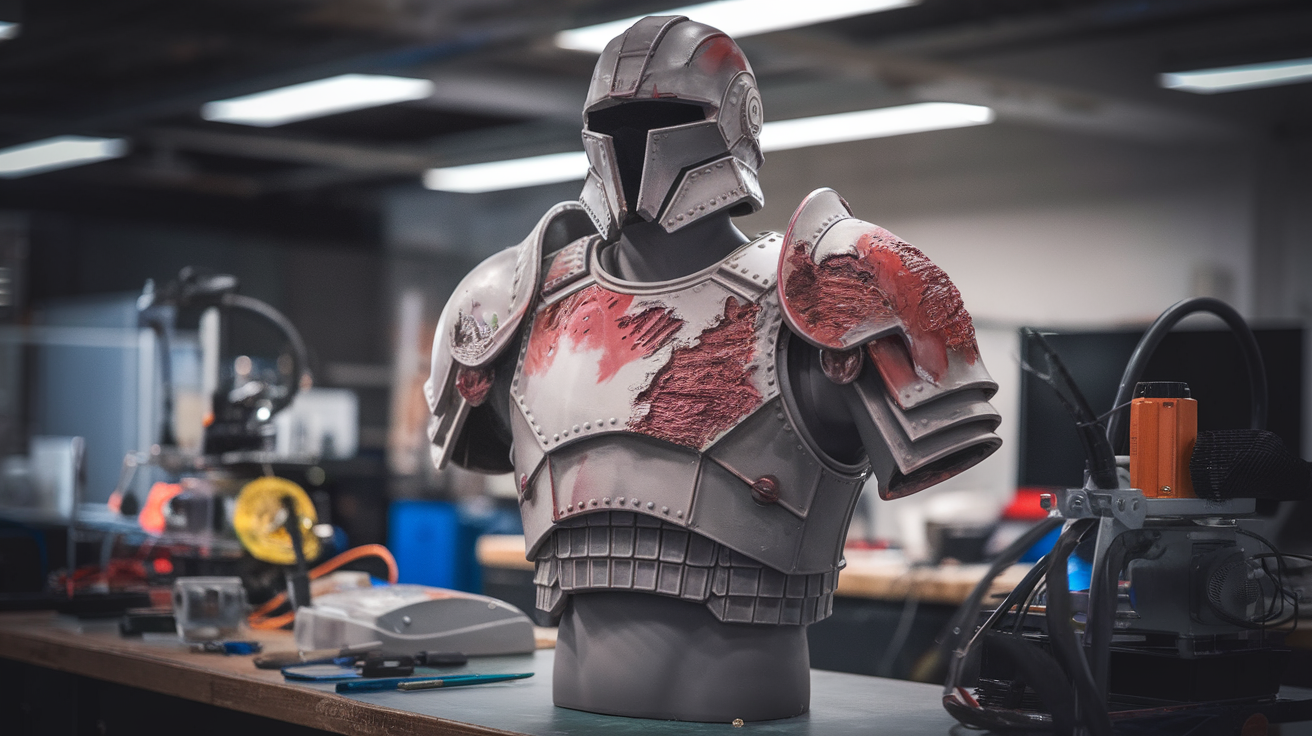
Paint chipping on real armor happens in irregular patches, with sharp edges where the chip occurred and softer transitions where the chip has been around long enough to oxidize at the perimeter. Reproducing this with a brush is hard; reproducing it with a torn piece of household sponge is easy. Tear (do not cut) a kitchen sponge into a fragment about the size of a fingertip, dip the torn edge lightly in chip color (typically a metallic silver under a colored base coat, or a brown under a gray basecoat), dab off most of the paint on a paper towel until the sponge looks almost dry, and then press the sponge gently against the armor surface where you want chipping.
The torn sponge produces irregular paint deposits that do not repeat, which is exactly what real chipping looks like. Apply chipping concentrated on impact points (knees, elbows, leading edges of pauldrons) and avoid applying to areas that would not realistically see impact. Less is more — a few well-placed chip clusters read as authentic, while uniform chipping across every panel reads as a paint technique rather than as wear.
For a layered chip effect, apply the silver chip color first, let it dry, and then apply small dots of black or dark brown inside the silver chips with a tiny brush. This produces the appearance of paint chipped down to bare metal, then partially oxidized — a visual depth that single-color chipping cannot match.
Drybrushing for Dust and Dry Wear
Drybrushing — loading a brush, wiping nearly all the paint off, then sweeping the brush across raised surfaces — produces the appearance of accumulated dust and surface wear. The technique applies to entire armor surfaces rather than just edges, and the paint catches on every micro-texture across the surface. For FDM prints, the layer lines themselves serve as the micro-texture and the drybrush produces beautiful results; for resin prints, you may need to deliberately add surface texture (light sanding with 220 grit, or a textured primer coat) before drybrushing produces visible deposits.
Color choice matters. For desert-themed cosplay, drybrush with a sandy beige. For forest themes, a warm gray-brown. For battle-damaged urban themes, a cool gray. The drybrush color should be lighter than the base coat in value but desaturated — bright drybrush colors look like deliberate paint rather than accumulated dust.
Pin Wash for Recessed Detail
Recessed details (panel lines, rivet recesses, joint gaps) read more clearly when filled with a darker shadow color. The method is the opposite of drybrushing: you load a brush with a thinned dark wash (oil paint thinned with mineral spirits, or acrylic paint thinned with flow improver), touch the loaded brush to the recess, and let capillary action pull the wash into the recess. Excess wash on the surrounding flat surface gets wiped off with a clean cotton swab.
For FDM armor, the layer lines themselves can be enhanced with a very light wash — applying a wash that is only a half-shade darker than the base coat across an entire panel produces depth that the eye reads as honest rather than as paint. For resin armor with crisp panel lines, a darker wash applied only to the panel-line recesses reproduces the look of military-spec armor very effectively.
Streaking and Fluid Stains
Vertical streaks of darker tone — running from joint gaps, vents, and bolt heads — produce the appearance of weathering by water and dust running down the armor surface over time. Apply with a thin liner brush loaded with a thinned dark color (the same color used in the pin wash works well) by dragging downward from the source point. Streaks should be irregular in length and density, with longer streaks under more frequently leaking points (joints, vents) and shorter streaks under occasional sources (rivet heads).
For armor that is meant to look freshly battle-damaged rather than years old, add streaks of warmer brown or rust tone running from chip locations — implying that recent water exposure is causing the chipped metal to oxidize. For armor meant to look ancient, use cooler gray streaks that suggest accumulated grime rather than active rust.
Scorch Marks and Burn Effects
For sci-fi or post-apocalyptic cosplay, scorch marks dramatically increase the perceived intensity of the damage story. Apply scorch with three layered colors: a warm gray base spray (or hand-sponged for irregular shape), a darker gray to charcoal applied at the center of each scorch zone, and a touch of black applied only at the most-damaged points. Each layer should be smaller than the previous, producing a graduated appearance that reads as heat damage rather than as intentional paint.
Scorch marks should appear in clusters near impact points (around chipping zones) and not uniformly. A scorch mark with no associated chipping reads as decorative; a scorch mark adjacent to a chipping cluster reads as a battle event that produced both effects.
Sealing the Weathering
The final step is a clear coat that seals all the weathering layers. Matte or satin clear is appropriate for most weathered cosplay; gloss reads as too clean for a battle-damaged look. Apply the clear coat in light passes from a spray can or airbrush rather than brushing, since brushed clear can disturb the weathering layers underneath. Three light passes spaced 15 minutes apart produce a more durable seal than one heavy coat.
For convention-day durability, the clear coat is not optional. Acrylic weathering layers without a clear coat will rub off on the wearer’s skin within an hour of wearing the armor. A properly sealed weathered prop survives multiple convention days and storage between events without losing the wear story.
FDM-Specific Techniques That Resin Prints Cannot Replicate
FDM armor’s layer lines provide texture that resin armor lacks, and several weathering effects work better on FDM as a result. Drybrushing along the print direction emphasizes the layer lines in a way that reads as brushed metal — particularly effective on metallic base coats. A wash applied perpendicular to the layer lines produces a fine cross-hatch shadow effect that mimics fabric weave or leather texture. These FDM-specific effects let cosplayers lean into the print artifacts as features rather than treating them as defects to hide.
For cosplayers who want the smooth surface of resin armor with the texture-friendliness of FDM, a textured primer coat (Rust-Oleum Stone, or a heavy spray of automotive textured primer) on resin armor produces a surface that accepts weathering similarly to FDM. The texture coat adds 1-2 hours of work but unlocks the full weathering toolkit on resin parts.
Practice Pieces Before the Hero Panel
Every technique in this guide should be practiced on a sacrificial test print before being applied to a hero panel. Print a 50×50 mm flat tile in the same filament as your armor, apply your base coat in the same color, and then practice each weathering technique on a quadrant of the tile. The practice tile takes an evening to prepare and saves you from learning to drybrush by ruining the front of your chestplate. Hobbyists who skip this step inevitably end up with one panel that reads as “the panel I learned weathering on” — visually distinct from the rest of the suit in a way that breaks the illusion. The practice tile is the cheapest insurance in cosplay finishing.